VSFX 755 - Procedural 3D Shader Programming
Directional Occlusion via an RSL Light Shader and Point Clouds
Project Summary:
Create a light shader that calculates occlusion based on light direction as opposed to more standard ambient occlusion rendering that is surface shader-based. It should be able to use ray-traced or point-based occlusion based on user-input. This includes learning to generate and reuse a point cloud in Maya.
Results:
Click on the image to the right to see a final video. The shaders' code can be found in the 'Shaders' section. For a step-by-step walkthru see the 'Process' section.
The Brief
Generating and using a point cloud in Cutter is fairly straightforward by creating a surface shader that does the calculations. However, using Maya's built in point cloud generation mechanisms becomes much more convoluted due to the way Renderman for Maya uses passes to generate various data.For this project I used a simple scene built in Houdini as an assignment for another class. Since the content is not critical to the light shader I just needed something with varying surfaces to show it's effect.
At first, the shader route didn't work once brought into Maya so I spent quite alot of time struggling with the various passes to try and get a usable, or indeed ANY, point cloud out of Maya. I researched and followed various techniques others had posted online or found in the Renderman documentation but none worked very easily. Some routes led to the renderer using a point cloud (as evidenced in the RIBs generated at render time) but not outputting it for the user. Others output point clouds but they had darkness information already baked in, for instance in the form of radiosity. Therefore when that cloud was used to calculate occlusion the darkness would double up causing errors and splotches.
As things became more and more convulted I decided to return to square one and remembered to "keep it simple, stupid". I reset the scene to bare bones and tried again using the surface shader to generate a clean point map. After some (ok, alot) of fiddling I got Maya to cooperate and the shader worked a treat. No extra passes, no fancy environment lights, just SIMPLE.
After more experimentation and modification to the light shader, the occlusion based on the shader-made point cloud was largely successful. This included removing the settings in Maya used to make the point cloud to ensure that it wasn't calculated repeatedly for each frame, overwriting and ruining the clean cloud. There are still some artifacts in the render but I think these are based more on geometry idiosyncracies than it is on the point cloud.
Progression thru Images
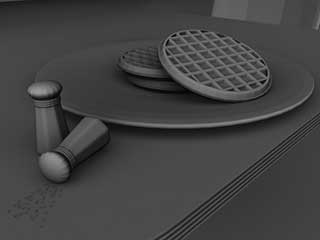
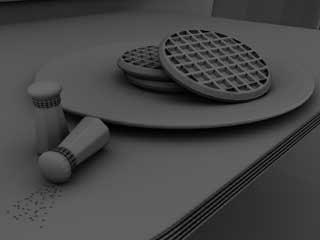
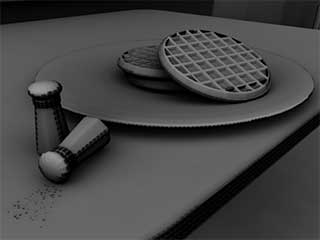
(left to right, top to bottom)• Basic ambient-style occlusion made by Maya when using an environment light and radiosity pass.
• Ray traced directional occlusion generated using our custom light shader.
• Point-based directional occlusion using the light shader and the point cloud made with the surface shader.
The full size reveals the splotches and errors that come from this method. I think these are largely due to the geometry since the point cloud SEEMS to be clean.
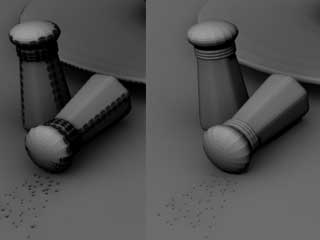
• A before and after shot showing the point occlusion without and with the bias parameter added to the light shader.
Some artifacts are still evident after adding bias, particularly in the video, but this fixes the majority of them.

The Shaders
The process required a directional light shader that adds into its normal calculations those needed for directional occlusion from either ray-traced or point cloud-based sources. I used a special surface shader to generate that point cloud.The Process
• Apply the surface shader above to anything the scene that should be in the point cloud• Fill in the filename parameter with a place to spit out the point cloud and the name for it
• Renderman menu --> Shared Geometric Attributes --> Create
• Click edit, this should bring up the attribute editor, name it something
• Attributes --> Renderman --> Manage Attributes
• Add "Cull Backfacing", "Cull Hidden", and "Dice Rasterorient"
• Once they are added uncheck all of them
• Select all the objects that you want to be included in the occlusion and in the SGA window click "attach"
• Render Globals --> Advanced --> RI Injection Points --> Default RiOptions MEL and add:
RiDisplayChannel("float _area");
This tells the renderer to expect the information coming out of the point-cloud surface shader and what to do with it.
It is specific to the code above so changes to the shader may require matching changes to this line.
• Create a camera to be used solely to make your PTC and place it somewhere so that everything needed for the cloud is within its view
• Render globals --> Common tab --> set your renderable camera to the one you just made
• Batch out a render, the PTC file should end up at the location you filled into the surface shader
• There should be no holes in your PTC, if there is go back and check over the steps
IMPORTANT:
Once you are happy with your point cloud remove the surface shader from everything in your scene. Failing to do so will cause the clean cloud you just made to be overwritten by a faulty one. Also, remove the SGA group you created to add the cull and dice attributes to. Failing to do that will result in unncessarily long render times, counteracting the economy of reusing point clouds.
Now you can add you directional light and the occlusion shader (found above) for it. Rendering as is will tell the shader to use raytraced occlusion (make sure raytracing is turned on in your globals). Entering the path to the PTC into the light params will tell it to use the cloud and should save time on your render. Rememeber that with this set up lights and cameras can move but objects cannot.
Errors and Anomalies Along the Way
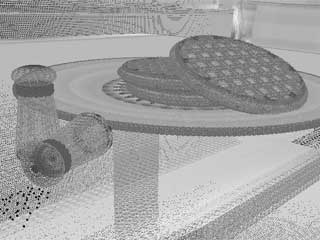
As I previously mentioned this whole process took alot of trial and error and experimentation, slightly adjusting values or steps in the process to see what changes made a difference and what was ignored. The majority of the problems I encountered seemed to stem from the way Maya bakes point clouds. Because the process usually goes thru render passes, other information unnecessary to occlusion rendering was being baked into the clouds and skewing the results. At least I think that's what I was seeing throughout the process. Using point clouds baked in Maya for the light shader repeatedly spit back errors stating that no "_area" channel was present. This would of course cause issues because area data is precisely that occlusion calculations need to work. Upon examining the point clouds further I think that the occlusion command was using other, incorrect channels instead hence giving me bad renders. Unforetunately, I don't know enough about the inner workings of the whole thing to really verify this.• Ptfilter is a simple command line program that will pull a specifc information channel from a point cloud and generate a new one with it. I used this to pull out the radiosity channel from the clouds made by Maya. You will notice that the dark portions in the image correspond nearly verbatim with the large splotches seen in early renders.
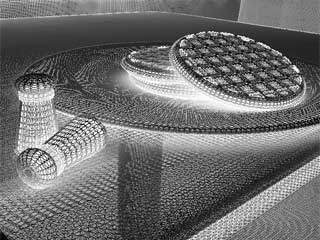
• This is another filtered cloud which I made by pulling out the _occlusion channel in the Maya cloud. At first glance it appears correct in that the areas with the largest, lightest circles are the ones that should be most occluded.
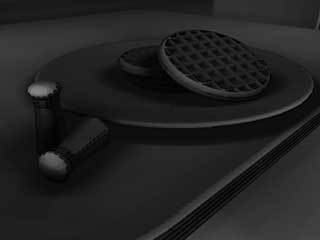
• However, using that filtered point cloud to calculate occlusion resulted in this overly dark image. It seems that the pre-baked values were being compounded into the newly calculated occlusion.
